I’d like to go into a little more detail about thought processes and technical notes for each one of the Digital Creativity in the Classroom weekly projects.
The Photoshop assignment

Creative Challenge – Big and Small: You’ll need to take two images of yourself and relate them to one another – one a supersized (or normal) version of you, the other a normal (or super-small) version.
I’ve had a recurring nightmare over the years where I’ve switched sizes with one of my pets and I’m being hunted down. That was my inspiration for this project. While this did not exactly meet the assignment given because I did not use two versions of myself (or two versions of the same person, animal, or item), I still felt it related big and small in a way that was more personally inspiring to me.
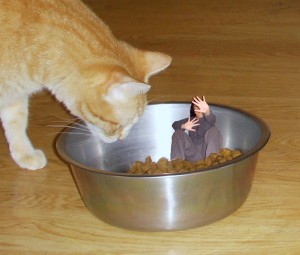
I did not have a good location to stage a hunting scene with any of my pets, so I skipped straight to where I was already captured for the next meal. Somehow I also skipped right over the fact that it was neither easy nor kind to ask them to pose with a partially filled bowl of food and do nothing but look in. I was planning to do the scene with one of the dogs and hope their obedience training would get us through the photo shoot. I didn’t expect the photobombing cat, but I ended up using his portion of that photo.
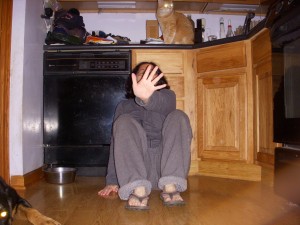 There were no other humans around to help me with photos, so the photo of myself was taken using the 10-second timer on my point and shoot camera. Why is 10 seconds so long when you are trying to fill it in a speech class, and so short when you are trying to get from one side of the kitchen to the other without hurting yourself? This was an outtake as the version where I have both hands outstretched worked much better.
 I used the Quick Selection tool and the Eraser tool with a Wacom Graphire tablet to do a quick ‘n’ dirty outline and clean it up a bit. I admit to not using best practices in production: I did not use a mask, duplicate layers, or other non-destructive techniques. In an actual production situation, I like to think I’d be more careful!
Putting it all together
Here is the photo I picked for the “dog” version (1).
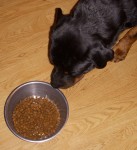
I cropped it down and made it the bottom (background) layer of my file (2).
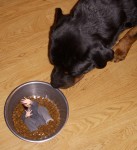
I placed the outlined photo of myself on the next layer, rotated it counterclockwise, and erased my feet (3).
The bottom of the bowl was showing through where my feet should have been, so I added some layers with a few pieces of kibble outlined and pasted onto each, like this one (4).
See above for the finished product as well as the “cat” version. Click on any of the photos to display a larger version.
One of my goals is to add more graphics to any appropriate instructional or informational materials I prepare. I am not sure how often I will need to use photo montages but I will watch for opportunities to do so.
